
Quick Summary
Systematic automatic gate opener troubleshooting helps property owners quickly distinguish between simple sensor obstructions, mechanical track binding, and serious electrical failures when an automated entrance system fails to operate. Experts at Ironworks Gate Co. recommend starting with manual hardware checks and photo-eye cleaning, while advising that complex issues like failing start capacitors, fried control boards, or structural post sag require professional intervention. By following these practical diagnostic steps, readers will be able to safely resolve basic gate malfunctions and determine when to call certified technicians for professional diagnostics and repairs.
Automatic Gate Opener Troubleshooting: Fast Fixes
If your driveway gate is stuck open or dead in its tracks, systematic automatic gate opener troubleshooting will help you pinpoint whether you are dealing with physical binding, blocked safety sensors, or an electrical failure.[3]
While clearing spiderwebs from a photo-eye takes two minutes, working around heavy automated gates requires caution. The U.S. Consumer Product Safety Commission estimated roughly 300 emergency-room injuries per year from automatic gates between 2011 and 2015. As specialists at Ironworks Gate Co. point out, knowing when a quick reset will fix the problem and when structural sag or high-voltage control boards require professional repair keeps you safe and prevents costly motor burnout.[2]
Work through the diagnostic steps below to isolate the issue before you spend money on replacement parts.
Fast Automatic Gate Opener Troubleshooting: Quick Summary
When an electric gate opener is not working or your electric gate is stuck open, always start with the physical hardware before opening the electrical control box. Disengaging the motor arm or drive chain lets you feel for hinge binding and track resistance. If the physical gate panel does not swing or slide freely by hand, no amount of electrical troubleshooting will get the motor running properly.
Immediate Action Checklist
- Disengage the operator: Release the manual clutch or pull the disconnect pin per the operator manual to test how easily the gate swings or rolls by hand. Look for post sag, dragging bottom rails, or binding hinges.
- Clean and align safety sensors: Wipe away dirt, spiderwebs, and moisture from the photo-eye lenses, and verify alignment according to manufacturer instructions.
- Check the power supply: Verify the main breaker, test the reset button on GFCI outlets, inspect low-voltage fuses, and check backup battery terminals for corrosion as outlined in your user manual.
What You Will Need Before Troubleshooting Your Driveway Gate
Gather basic tools and consult your equipment manual before testing your system. Having them on hand lets you inspect the gate safely without damaging delicate control boards or risking electrical shock.
Essential Tools and Safety Gear
- Manual release key or disconnect pin: Allows you to disengage the motor and open the automatic gate manually per manufacturer guidelines. Never force a motorized gate by hand without disengaging the drive mechanism first.
- Digital multimeter: Measures incoming line voltage, transformer output, and standby battery charge.
- Microfiber cloth and soft brush: Cleans optical lenses and reflector hoods without scratching the plastic.
- Insulated hand tools: Protects against contact with live terminal blocks inside the control enclosure.
A derailing or falling gate panel can cause catastrophic injury. If you discover cracked hinge welds, rotted mounting posts, or severely bent tracks, stop and call a professional gate technician before proceeding.
Step 1: Release the Motor to Check for Mechanical Binding and Post Sag
As detailed in manufacturer installation and maintenance manuals, verify that the gate moves freely on its own before adjusting limit switches or swapping out circuit boards. Modern gate operators use internal current-sensing limiters; if the motor detects excessive physical resistance, it stops or reverses to prevent motor damage or entrapment.[5]
Isolating Structural Drag from Electrical Failure
- Disengage the drive: Consult the manufacturer manual to turn the manual release key, unscrew the clutch handle, or pull the emergency disconnect pin for your swing arm, linear actuator, or slide operator.
- Test the full travel stroke: Slowly push the gate open and closed by hand. According to equipment guidelines, the gate should move smoothly with minimal effort. Resistance, catching, or scraping indicates a structural issue rather than an electrical fault.
Signs of Shifting Pilasters and Worn Hinges
In older properties, heavy wrought-iron gates mounted directly to brick or stucco pilasters frequently pull the masonry out of plumb over time. Ground settlement also accelerates post sag. When the hinge pin tilts, the gate drops at the latch end, causing friction that triggers the motor’s safety reverse mechanism.[4]
Step 2: Inspect, Clean, and Realign the Photo-Eye Safety Sensors
Need automatic gate opener troubleshooting?
We’re available now - call for a fast, free estimate.
Refer to your sensor manufacturer guide if your gate opens completely but refuses to close, or starts to close and instantly reverses. These optical sensors send an infrared beam across the driveway; if anything breaks the beam, the controller prevents the gate from closing.
Cleaning Residue and Debris
Because photo-eyes sit close to the ground, they attract dust, garden debris, spiderwebs, and condensation. Per manufacturer cleaning recommendations, wipe the lenses thoroughly with a dry microfiber cloth and inspect the inside of the sensor hood for insect nests or debris blocking the optical path.
Checking Indicator LEDs and Alignment
- Refer to the sensor manual to interpret indicator lights on the emitter and receiver units. A steady indicator light typically confirms proper power and alignment, while a dark or flickering indicator signals an obstruction or misalignment.
- Follow the manufacturer guide to adjust mounting hardware and realign the sensor until the alignment indicator indicates a clear beam.
- Inspect the low-voltage wiring running back to the control box for damage, cuts, or loose terminal connections.
Step 3: Test Electrical Power, Breakers, and Control Board Fuses
If the operator shows no sign of power and the control board LEDs are unlit, follow the power verification procedures in the operator service manual.
Verifying Line Voltage and Surge Protection
- Check the main breaker: Check your electrical panel to verify that the circuit breaker has not tripped. If the gate runs off a GFCI outlet, test and reset the outlet per electrical safety instructions.
- Inspect surge protectors: Refer to your surge suppression manual to check the status indicator on inline surge modules for indications of power surge damage.
Inspecting Circuit Boards for Blown Fuses
- Inspect fuses: In accordance with the manufacturer manual, check low-voltage blade fuses on the control board for broken filaments or signs of failure.
- Check for control board damage: Inspect the circuit board visually for burnt components, moisture, or insect damage across terminals as advised by the manufacturer.
Work safely around live electrical terminals. Electrical malfunctions can cause sudden gate movement or eliminate safety stops entirely. ASTM International documented 47 work-related accidents in California from 1990 to 2024 involving fence gates derailing and falling, resulting in 35 injuries and 12 deaths. If you see charred wiring or failing power transformers, turn off the breaker and hire a qualified gate technician.[1]
Step 4: Check Remote Controls, Keypads, and Antenna Receivers
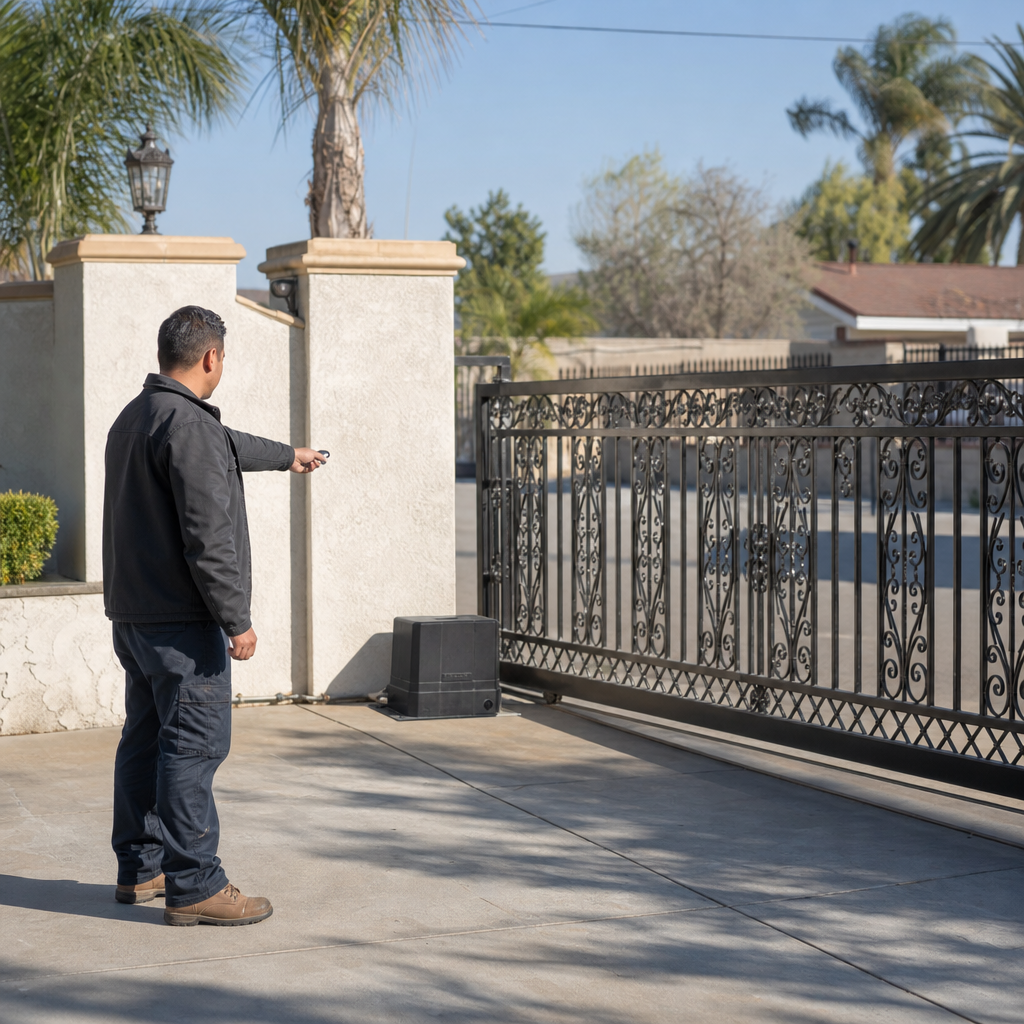
When the control board shows power but does not respond to input devices, consult the peripheral equipment manuals to test each access control component.
Eliminating Radio Frequency Interference
- Replace batteries in handheld remotes and verify that the external antenna wire is positioned correctly and free of corrosion according to the receiver instructions.
Testing Hardwired Keypads and Loop Detectors
- Consult the control board manual to test cycle inputs using the onboard test buttons or terminals. If the gate runs normally via onboard controls, check external remotes, keypads, or access stations.
- Inspect vehicle loop detector modules and connections per the loop manufacturer guide to ensure moisture or damaged wiring is not holding an open signal on the board.
Step 5: How to Safely Reset an Electric Driveway Gate Opener
Microprocessors in gate operators can enter an error lockout state following a power disruption. Refer to the manufacturer manual for the approved power cycle and reset procedure for your specific model.
Performing a Power Reset
- Switch off the main power at the breaker panel following safety protocols in the manual.
- Disconnect the backup battery leads inside the operator enclosure as described in the equipment guide.
- Allow the board to power down fully as specified in the operator manual before restoring power.
- Reconnect the backup battery leads and restore main power in the sequence directed by the manufacturer.
Recalibrating Limit Switches and Travel Limits
- Refer to the operator installation manual to enter the limit setup or learn mode, allowing the controller to re-map its open and close limits.
- If the gate stops short or reverses prematurely, adjust the travel limits in small increments following the manufacturer’s calibration instructions.
Critical Gate Components: Symptoms, Repairs, and Replacement Signs
Need automatic gate opener troubleshooting?
We’re available now - call for a fast, free estimate.
Identifying warning signs of component failure prevents minor mechanical issues from causing major damage, as noted in maintenance guidelines from Ironworks Gate Co.
Gate Motors and Internal Capacitors
If the motor hums but fails to turn the drive shaft, the motor start capacitor or drive assembly may have failed. Refer to the manufacturer maintenance manual for capacitor testing and replacement procedures.
Hinges, Rollers, and V-Groove Tracks
Squealing, grinding, or jerky movement indicates worn hinges, damaged rollers, or track obstructions. Inspect hardware and keep V-groove tracks clean and properly aligned according to hardware manufacturer recommendations.
Access Controls and Telephone Entry Systems
Intermittent keypad failure or intercom static often stems from damaged underground wiring, moisture intrusion, or corroded contacts inside the housing.
Automatic Gate Opener Brands and Diagnostic Considerations
Gate operator manufacturers provide model-specific diagnostic indicators and LED status displays on their control boards. Always consult the official manufacturer manual for your specific brand and model (such as LiftMaster, DoorKing, Viking Access, or Nice Apollo) to interpret diagnostic error codes, flash counts, and board terminal configurations accurately.
What Does Automatic Gate Opener Troubleshooting and Repair Cost? (External Estimate)
Note: The following cost ranges are general industry estimates from external sources not covered by the project brief and may vary by region, operator type, and contractor.
Typical Service and Component Considerations
Routine service visits to clear photo-eye faults, realign safety sensors, or replace blown fuses generally cost between $150 and $300 based on external estimates. Mid-level repairs, such as replacing start capacitors, wiring in new photo-eyes, or rebuilding heavy-duty hinges, typically range from $300 to $650. Replacing a control motherboard or installing a new operator motor generally ranges from $750 to $2,000 depending on the brand and horsepower required.
Frequently Asked Questions About Automatic Gate Troubleshooting
Why is my automatic gate opener not responding to the remote or keypad?
Check the batteries in your remote first, then verify power at the main operator board. If the board has power, inspect the radio receiver antenna for damage or corrosion. If hardwired keypads also fail, check for a blown accessory fuse or a triggered safety device per the operator manual.
Why does my automatic gate open partially and then stop or reverse?
This is commonly caused by post sag, hinge binding, or a misaligned track. When the gate drags or catches, the motor senses physical resistance and reverses for safety. Disengage the manual release per the user manual to test for mechanical drag across the full path.
How do I troubleshoot and clean automatic gate safety sensors?
Wipe both photo-eye lenses with a soft microfiber cloth to remove dust, spiderwebs, and moisture. Check the diagnostic LEDs on the sensor bodies according to the manufacturer guide, adjusting alignment until the indicator confirms a clear optical path.
Why is my gate opener humming but not moving the gate?
A humming motor that does not turn indicates a failed start capacitor, internal drive issue, or severe hinge binding. Disengage the manual release as directed in the manual to see if the gate moves freely by hand before replacing parts.
When is automatic gate repair safe to DIY versus calling a professional contractor?
Cleaning sensors, replacing remote batteries, checking fuses, and performing manufacturer-directed resets are straightforward tasks. However, technicians at Ironworks Gate Co. advise that high-voltage electrical work, post welding, spring adjustments, and full motor replacements should be handled by a qualified professional to prevent severe injury.
Need automatic gate opener troubleshooting?
We’re available now - call for a fast, free estimate.
Sources
- [PDF] 2024-11-20-COPF-CODD-Hummingbird-Alliance-Meeting-Log.pdf – cpsc.gov (2024)
- [PDF] 2015 Annual Report – Consumer Product Safety Commission – cpsc.gov (2015)
- Update of Automatic Garage Door and Garage Door Openers Entrapment Incidents to Children under 15 Years of Age Reported to CPSC Between December 1, 1996 and June 30, 2003 – cpsc.gov (2003)
- New Safety Standard for Automatic Security Gates Helps … – cpsc.gov (2001)
- Garage Door Operators/Gate Operators | CPSC.gov – cpsc.gov (2003)
Related reading: Manually Open Electric Gate – Call Now-10% Off – Same-Day Service – Free Estimate
Related reading: Automatic Gate Maintenance Checklist – Call Now-10% Off – Same-Day Service – Free Estimate
Related reading: Gate Sensor Repair – Call Now-10% Off – On-Site in 60 Minutes – Free Estimate
Frequently Asked Questions
Why does my automatic driveway gate open by itself or refuse to stay closed?
Ghost cycles and refusal to close are commonly caused by stuck vehicle loop detectors, moisture inside hardwired keypads, or misaligned photo-eye sensors. The technicians at Ironworks Gate Co. recommend checking the control board input terminal LEDs to identify which safety or access accessory is continuously sending an open signal.
How can I tell if my gate opener start capacitor is blown versus a dead motor?
A failing start capacitor usually causes the motor to emit a low humming sound without moving the gate arm, though the motor may turn if given a gentle manual push. Because capacitors store dangerous electrical charges even when disconnected from power, Ironworks Gate Co. advises having a professional test and replace the component safely.
How much does professional automatic gate opener repair typically cost?
Minor repairs such as realigning safety sensors, clearing track faults, or replacing blown fuses generally range from $150 to $300. More complex repairs like replacing a motor start capacitor or rebuilding hinges cost between $300 and $650, while full control board or motor replacements range from $750 to $2,000.
About the author
 |
Marcus Thorne Marcus Thorne is a security infrastructure specialist with over a decade of experience in automated gate systems and perimeter defense. Holding a degree in Mechanical Engineering from California State Polytechnic University, Pomona, he previously worked as a technical consultant for commercial property management firms across Southern California. Marcus focuses on providing clear, actionable advice on gate repair, maintenance costs, and security upgrades for residential and commercial properties. |
Gate not opening, off track, or opener dead?
We’re available now - call for a fast, free estimate.
Call Now - Free Estimate